Step by step instruction of MS Graph Mail API Image Import Profile setup in FlexiCapture 12.

Question

How to setup MS Graph API import profile?

The instructions for MS Graph API profile setup in Online Help are pretty lite, are you able to provide us with anything more robust?

What permissions to mailbox should be granted for MS Graph API import profile?

Answer

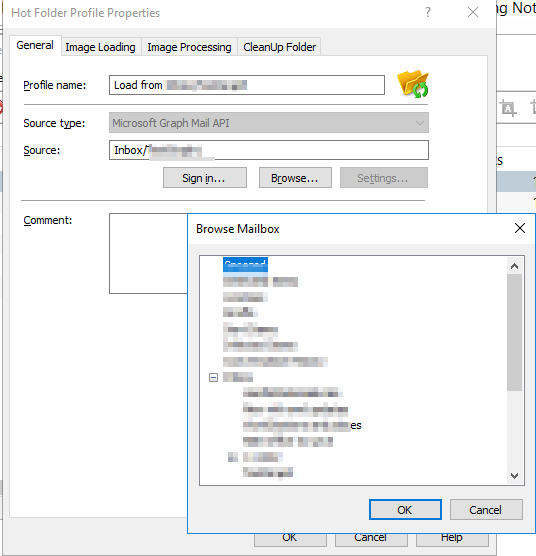
1) Select "Hot Folder" option and choose "Microsoft Graph Mail API" from drop-down list.


2) Click "Sign In", follow the link as prompted by setup wizard and choose the Microsoft account:


3) You will be prompted to give access to FlexiCapture 12 Graph Mail Import application:
mceclip0.png

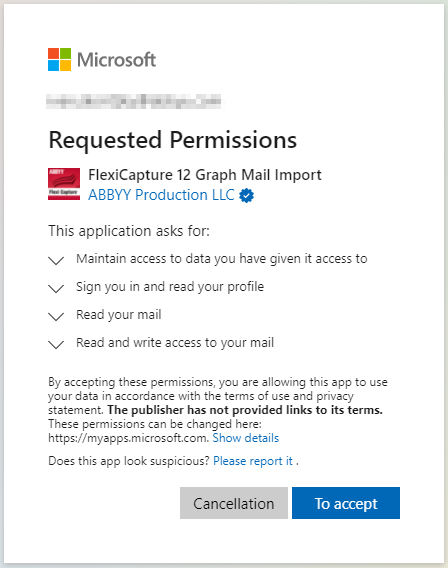
Following permissions are requested by application:

  • Maintain access to data you have given it access to
  • Sign you in and read your profile
  • Read your mail
  • Read and write access to your mail

4) Grant the access by clicking "To accept". Automatically, the following statement will be shown:​


5) Click "Finish" the OAuth 2.0 Authorization Wizard, the permissions are granted:​

​​

Note: You can check the added application manually in your Microsoft account: 
https://myaccount.microsoft.com/
https://portal.office.com/account/?ref=MeControl#apps


6) In Image Import Profile settings, click "Browse" button to select mailbox folder for image import source.

mceclip1.png

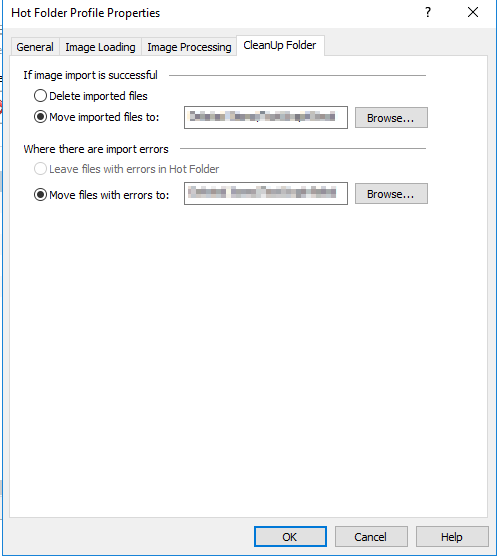
7) In i Image Import Profile settings, proceed to Cleanup settings and select options for successfully imported emails and erroneous emails per your choice:

mceclip0.png


Have more questions? Submit a request

Comments

3 comments

  • Avatar

    Julien Fremeau

    Thanks a lot for the detailed instructions.

    I can also add that if your on-premise ABBYY instance is not open to the Internet (network/firewall restrictions in your company) you have to adapt the step 2 above.

    Instead of clicking on the link proposed by the wizard, you have to

    1. Open a Internet Browser session as the user identity able to connect to the targeted mailbox. Open this internet session on a machine that has access to Internet.
    2. Copy and paste in this session the sign-in URL you have in the import profile setup wizard from ABBYY machine
    3. Once successfully authenticated in this session, copy the URL you see as a result of your authentication
    4. Connect back to the ABBYY machine from which you are setting the import profile.
    5. On this machine, open and internet browser session (even if no access to the Internet) and paste the URL from step 3 above

    This last step should get you successfully signed in

    0
  • Avatar

    Andrew Briggs

    Thank you for this information. I have this setup in our platform and it does work as expected; however, it appears the token is expiring and I have to reconnect to refresh the token. How can I keep this token alive so that I don't have to manually login to the server and refresh it?


    0
  • Avatar

    Julien Fremeau

    Token expired after 90 days. It's a default and it cannot be changed for now in latest Release 4 Update 1. Abbyy support informed me that they will add auto-refresh in next release 4 update 2

    So for now you have to set a reminder on your end and manually refresh the token by doing the sign in step again on each import profile 

    0

Please sign in to leave a comment.